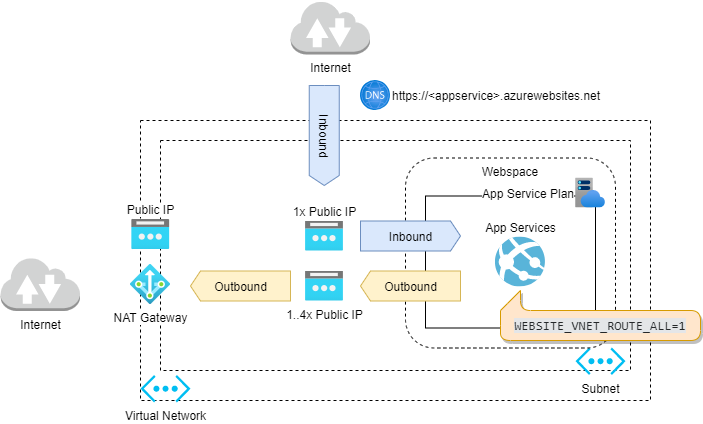
Static IPs in Azure: A Guide to Assigning Unwavering Addresses In the ever-shifting cloud landscape, maintaining consistent connectivity is crucial. Assigning static IP addresses to your Azure resources ensures they reach the outside world and internal services with unwavering precision. This article explores the world of static IPs in Azure, examining their benefits, use cases, and implementation methods.
Why Use Static IPs in Azure ?
Dynamic IP addresses, the default in Azure, offer flexibility but lack predictability. A virtual machine (VM) with a dynamic IP might change addresses upon reboot, disrupting connections and causing issues. Here’s where static IPs come in: Guaranteed Reachability: A static IP acts as a permanent address for your resource, ensuring it’s always reachable at the same location. This is crucial for applications relying on fixed connections, like remote desktop access or web servers. Enhanced Security: Static IPs simplify security rule configuration within Azure firewalls. By knowing the exact IPs of your resources, you can precisely control inbound and outbound traffic. Improved Manageability: Static IPs streamline resource management. With a fixed address, you can easily locate and connect to specific VMs or cloud services within your Azure environment. When are Static IPs in Azure Necessary? Not all Azure resources require static IPs. Here are some common use cases: Public-Facing Web Servers: Web applications need a consistent address for users to access them reliably. A static IP ensures your website remains reachable at all times. Database Servers: Databases often communicate with other applications and services. A static IP guarantees consistent connectivity, preventing disruptions. Remote Desktop Access: Granting remote access to VMs necessitates a static IP for secure and reliable connections. VPN Gateways: Establishing secure Virtual Private Network (VPN) connections requires static IPs on both ends for stability. How to create and assign static IP to resources? 1. Create a virtual network 2. Create a Function App in the Premium Plan 3. Create an HTTP Trigger Function 4. Create a public IP address 5. Create a NAT gateway 6. Configure function app to route outbound traffic through the NAT gateway Topology The following diagram shows the architecture of the solution that we need to create: 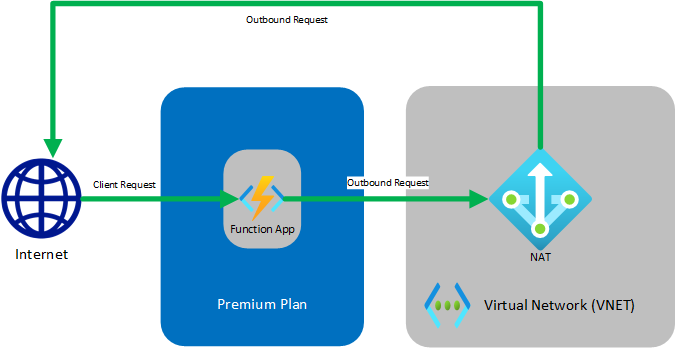 Functions running in the Premium plan have the same hosting capabilities as web apps in Azure App Service, which includes the VNet Integration feature. Step 1: Create a Virtual Network 1. From the Azure portal menu, select Create a resource. From the Azure Marketplace, select Networking > Virtual network. 2. In Create Virtual Network, enter or select the settings specified as shown in the following table:
  3. Select Next: IP Addresses, and for IPv4 address space, enter 10.10.0.0/16. 4. Select Add subnet, then enter Tutorial-Net for the Subnet name and 10.10.1.0/24 for the Subnet address range.
 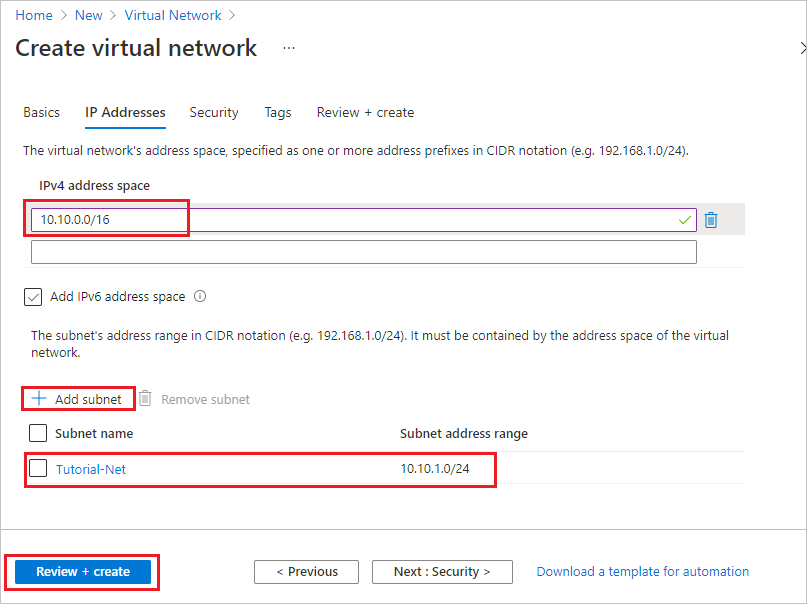 5. Select Add, then select Review + create. Leave the rest as default and select Create. 6. In Create virtual network, select Create. Next, you create a function app in the Premium plan. This plan provides a serverless scale while supporting virtual network integration. Step 2: Create a Function App in Premium Plan 1. Create a function app, which lets you group functions as a logical unit for easier management, deployment and sharing of resources. Functions lets you execute your code in a serverless environment without having to first create a VM or publish a web application.
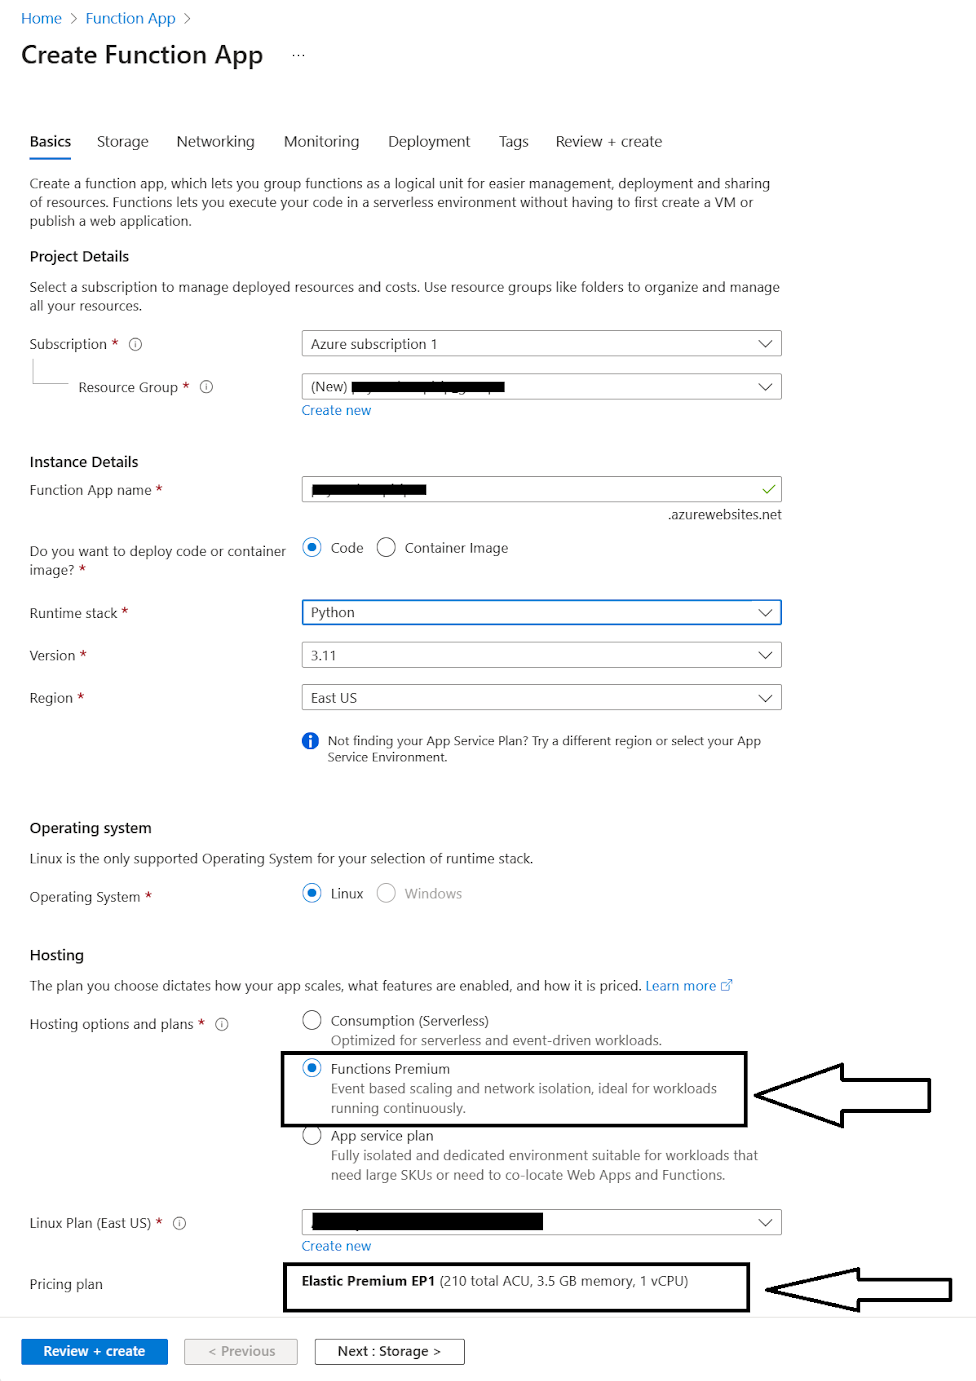
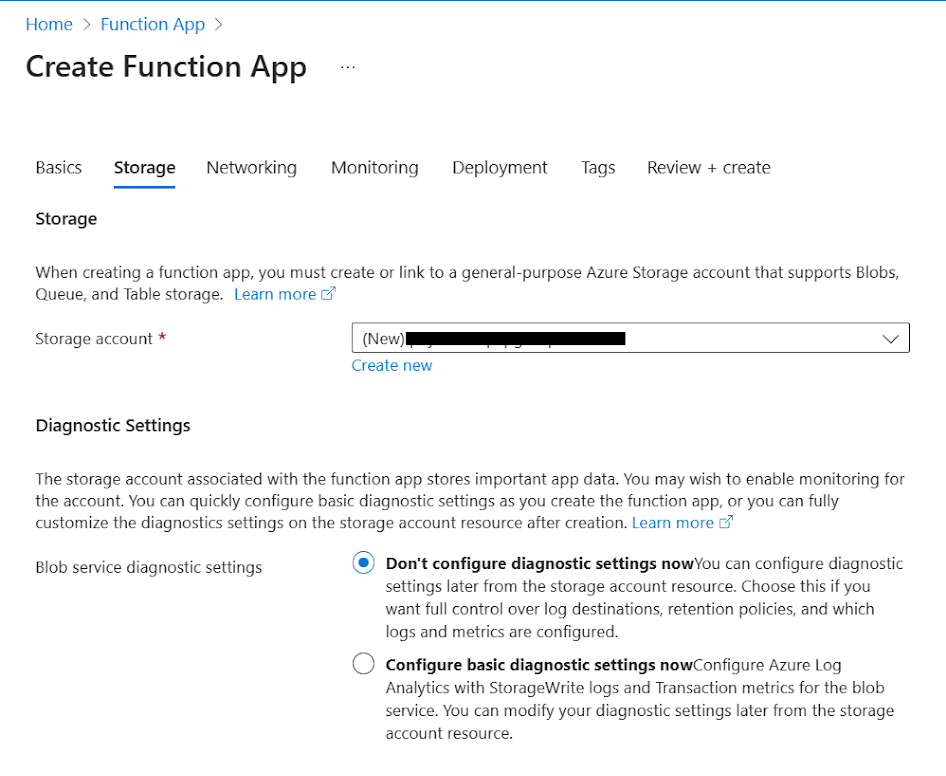 2. Next Do the Network setting and rest configuration and create a Function app.
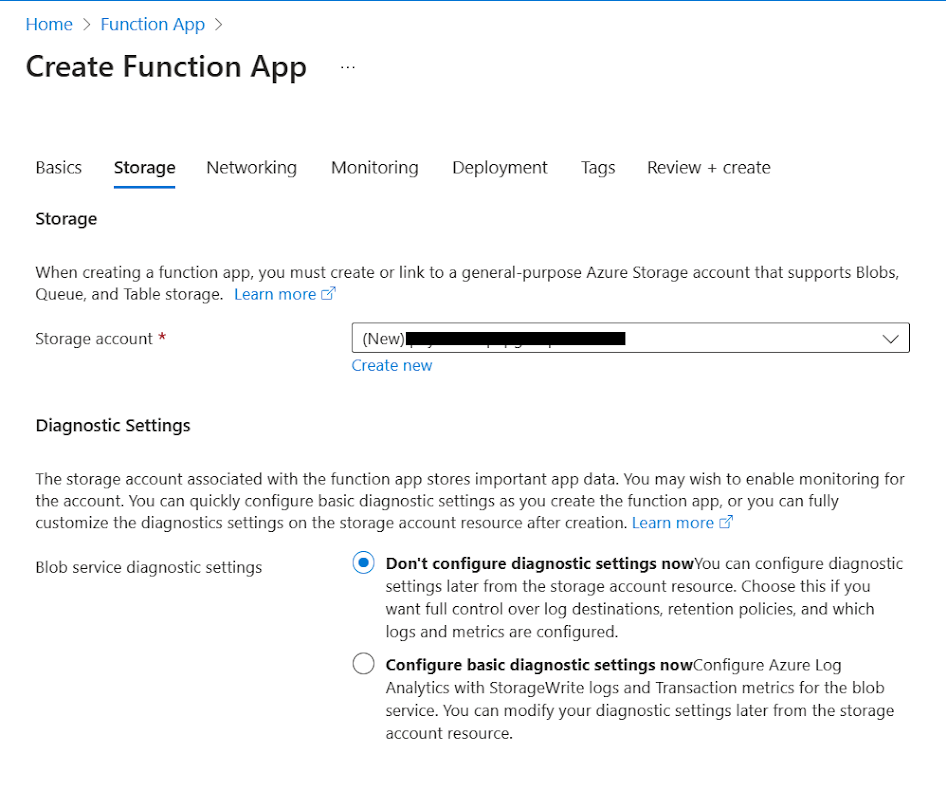
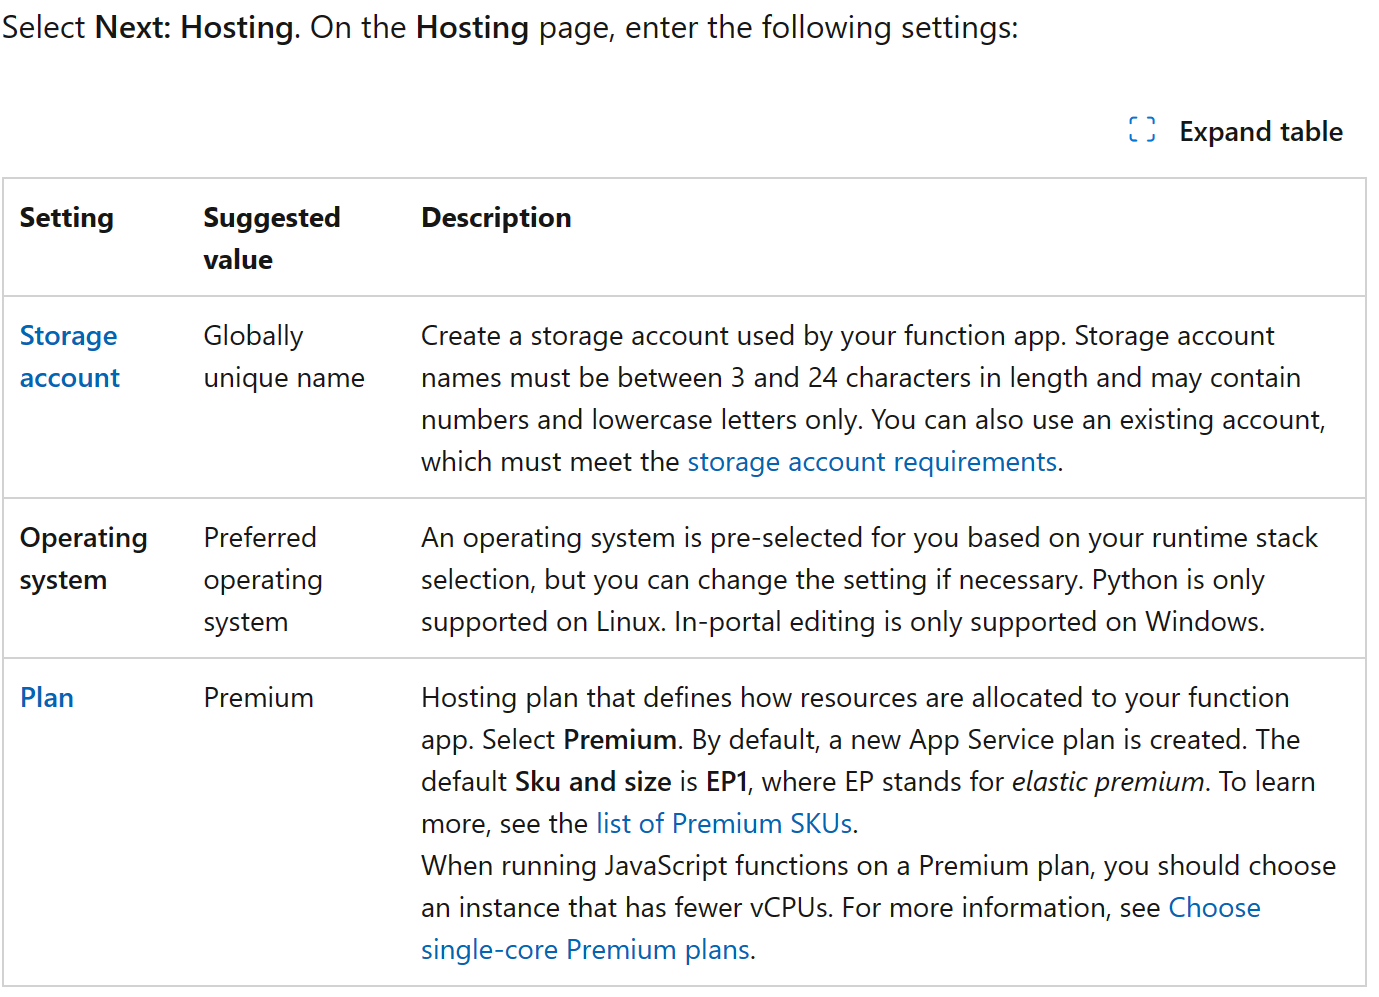
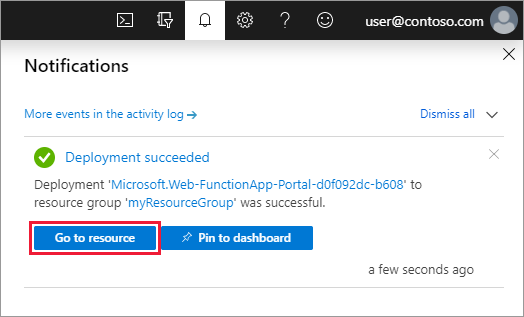
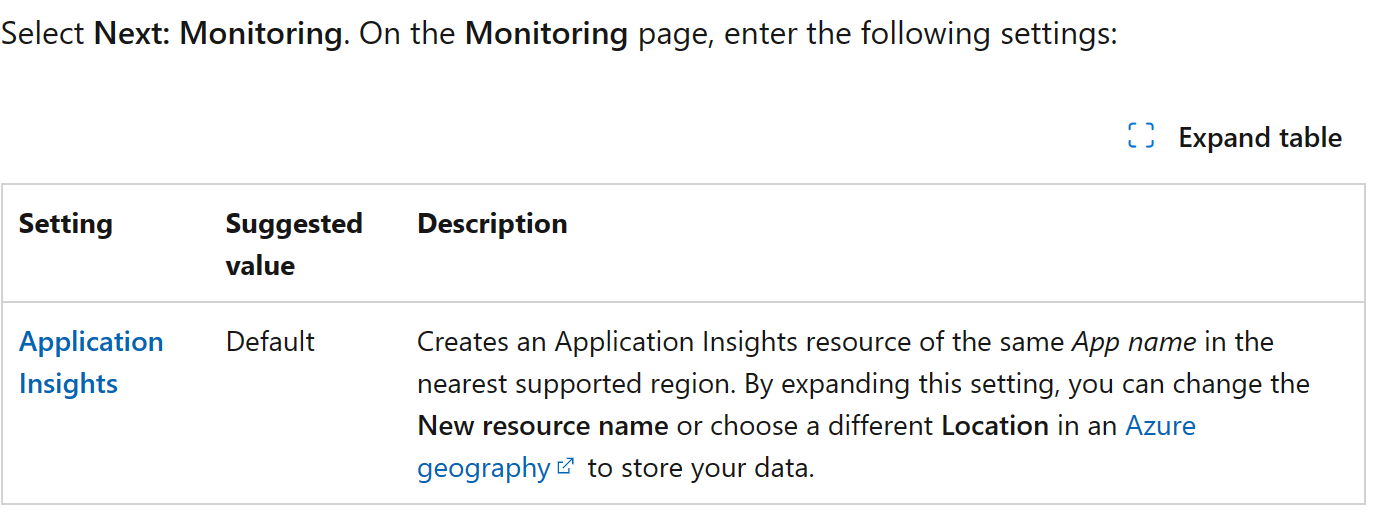 3. On the Review + Create page, review your settings, and then select Create to provision and deploy the function app. 4. Select the Notifications icon in the upper-right corner of the portal and watch for the Deployment succeeded message. 5. Select Go to resource to view your new function app. You can also select Pin to dashboard. Pinning makes it easier to return to this function app resource from your dashboard.
  Step 3: Create an HTTP trigger function 1. Follow the Azure portal instructions to create an HTTP trigger function within your function app. Step 4: Create Public IP Address
 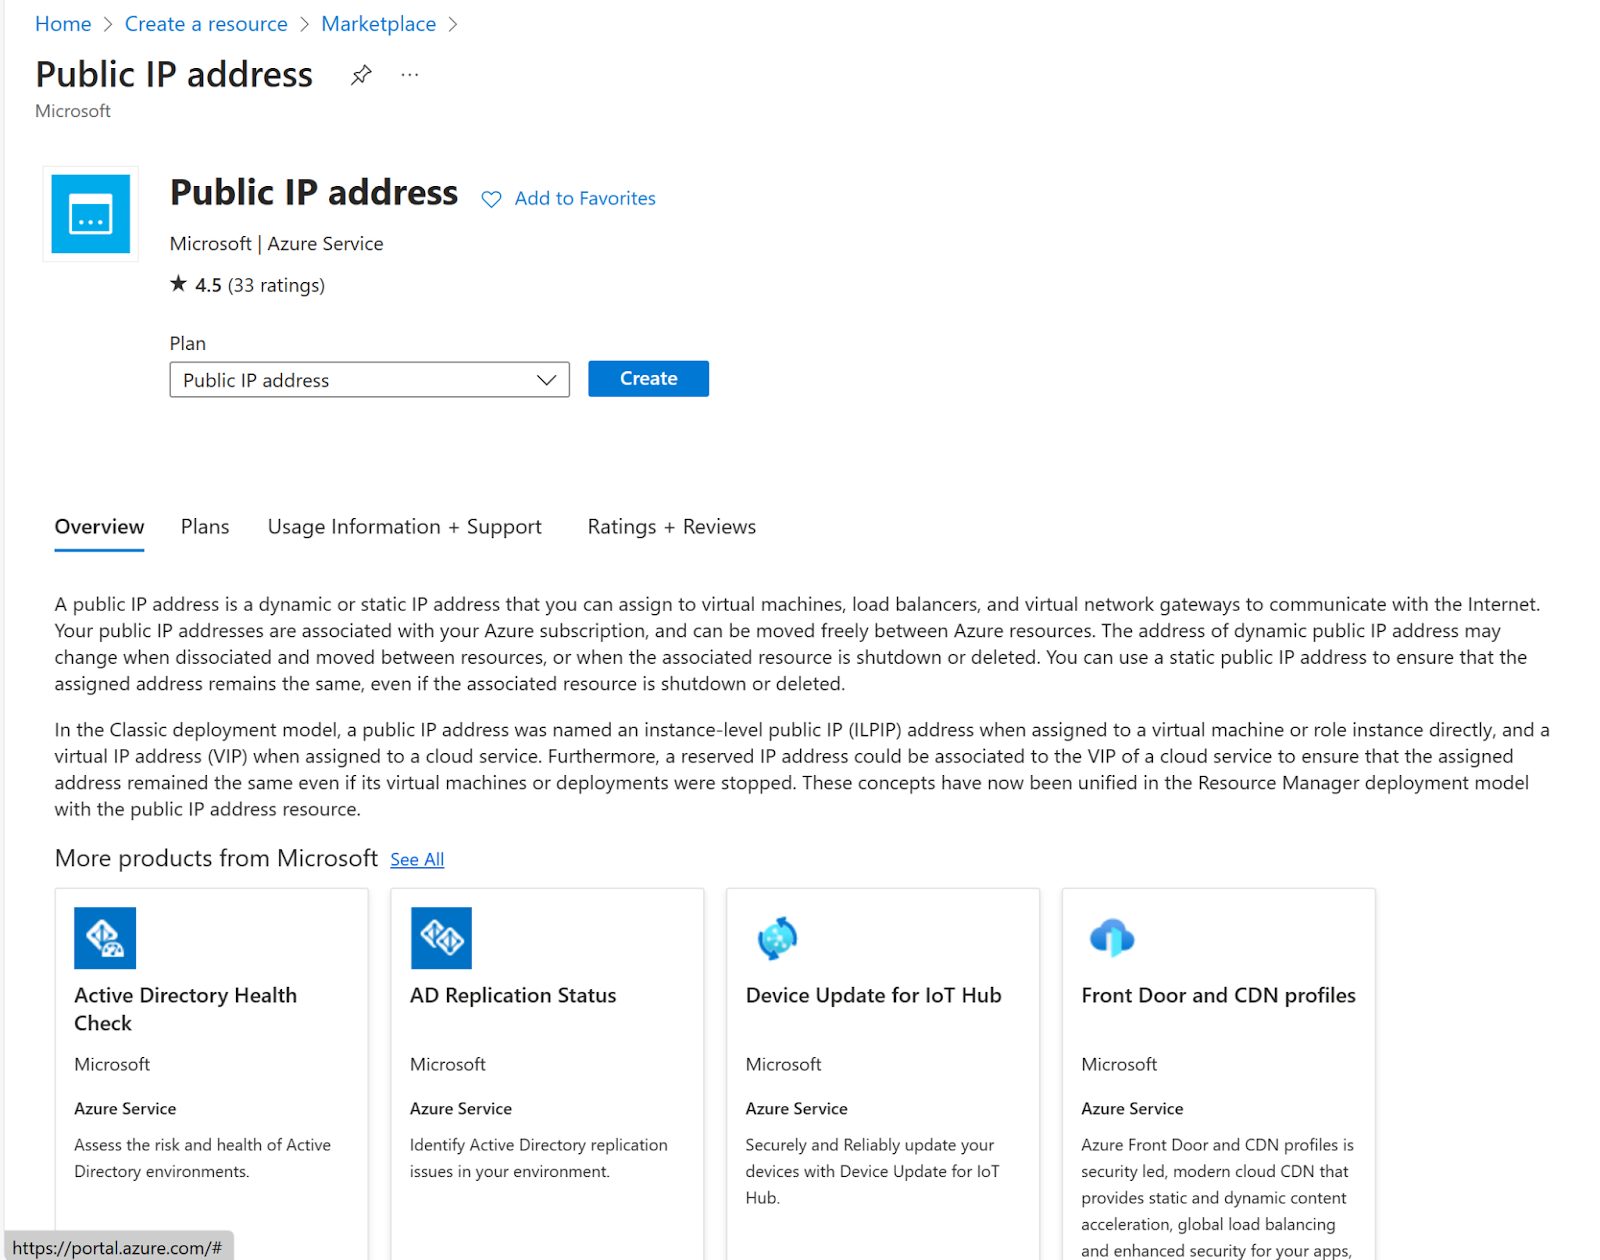 Step 5: Create Static IP
 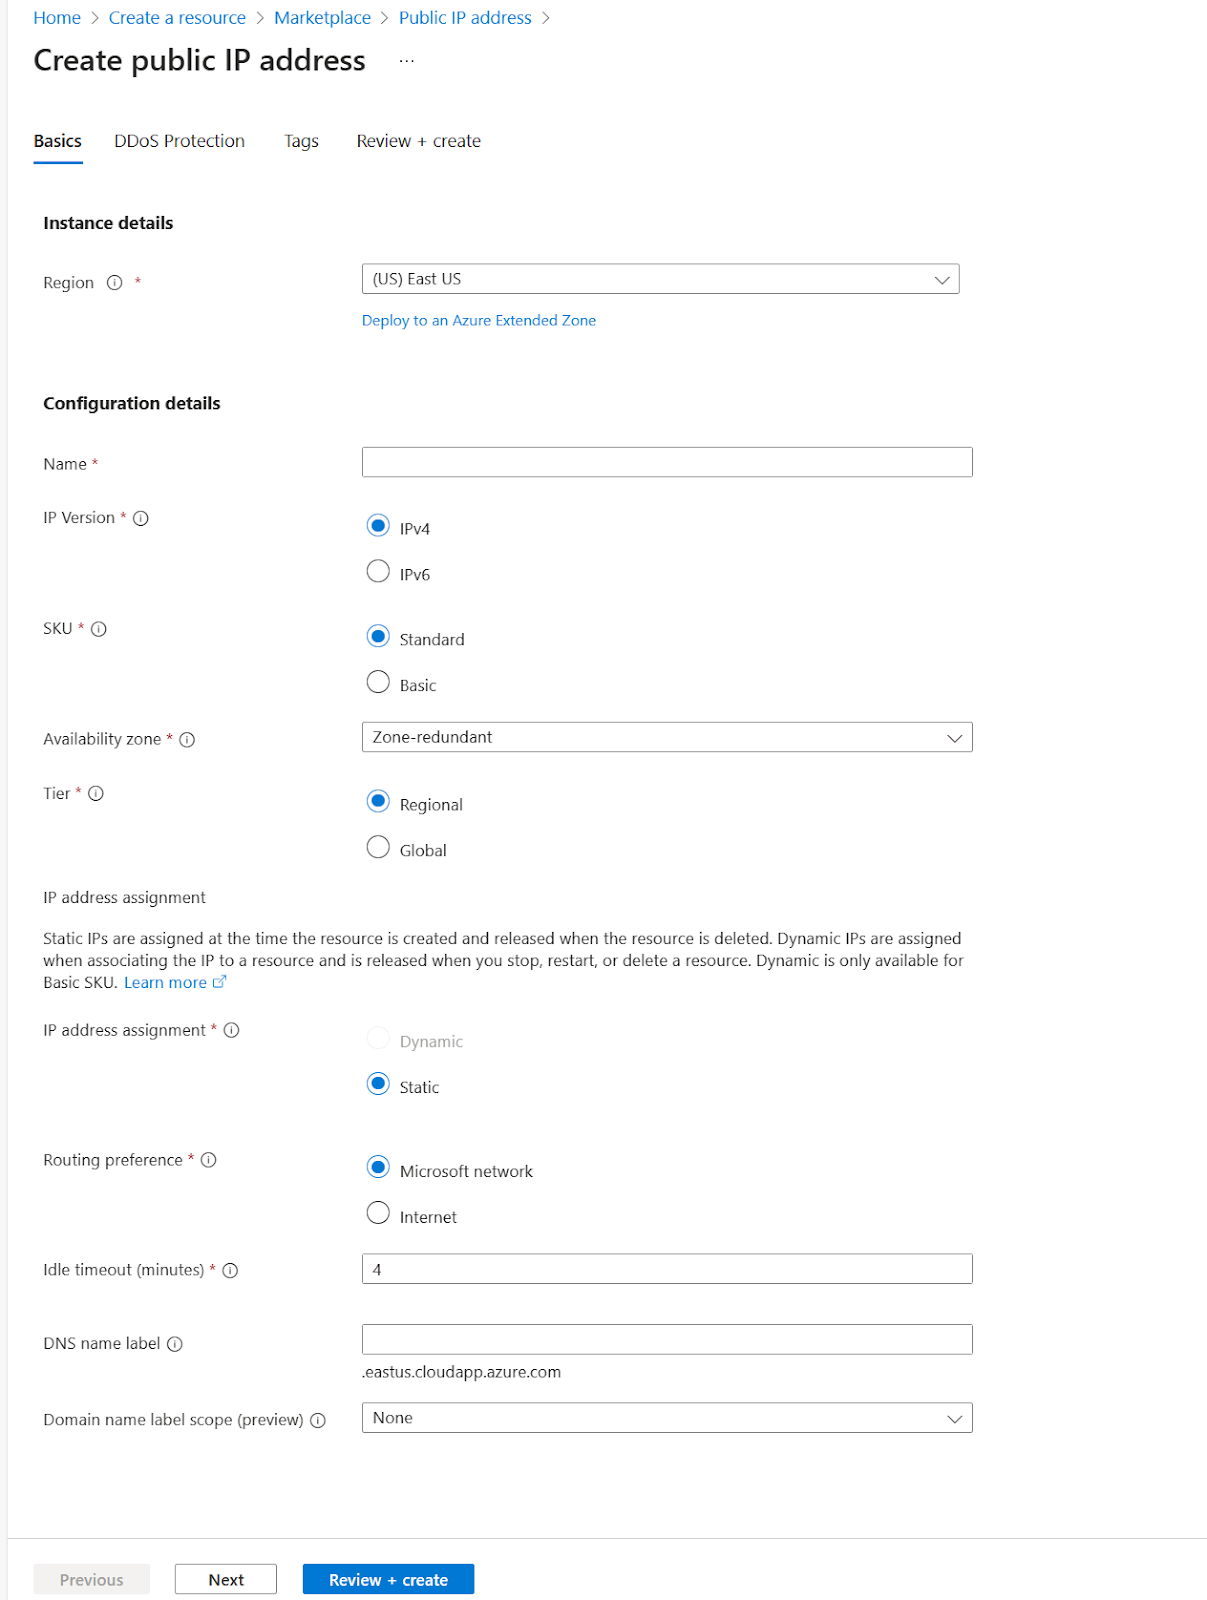 1.Once the deployment completes, navigate to your newly created Public IP Address resource and view the IP Address in the Overview.
  Step 6: Create NAT gateway 1. From your resource group, select Add, search the Azure Marketplace for NAT gateway, and select Create. Use the settings in the table below the image to populate 2. Use the following settings for the Basics tab:
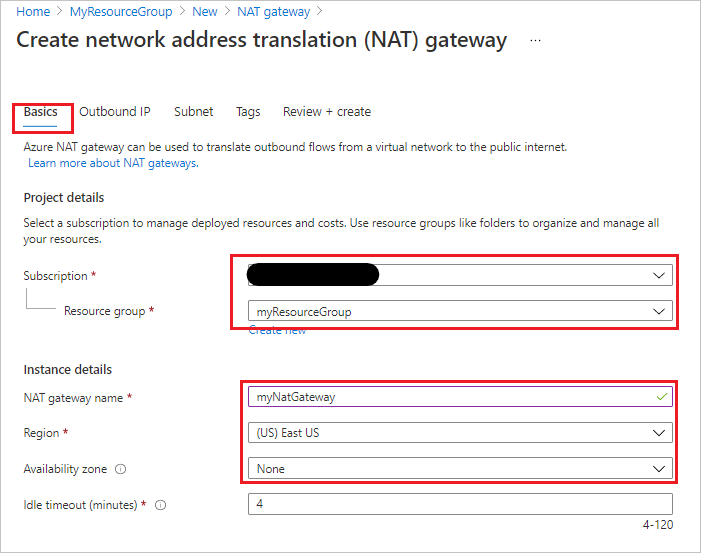
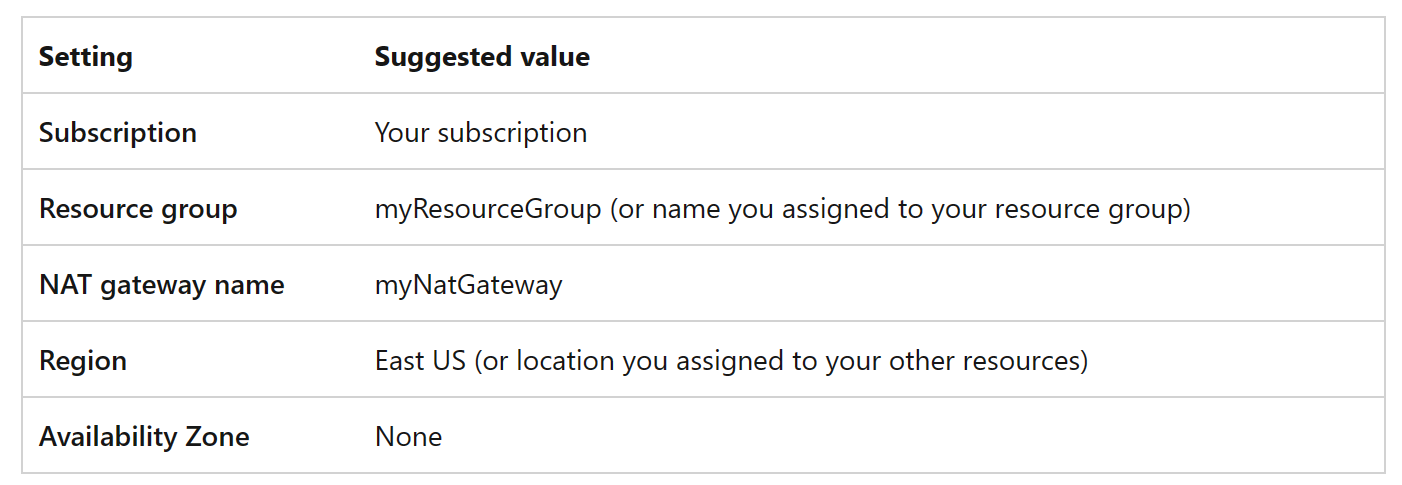 3. Select Next: Outbound IP. In the Public IP addresses field, select the previously created public IP address. Leave Public IP Prefixes unselected. 4. Select Next: Subnet. Select the myResourceGroup-vnet resource in the Virtual network field and Function-Net subnet.
 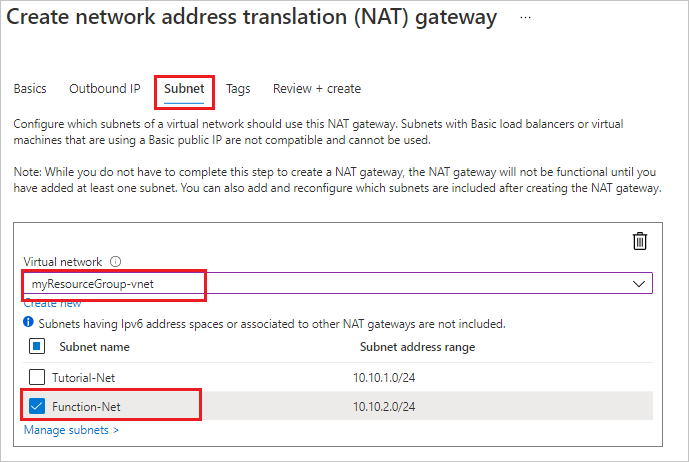 5. Select Review + Create then Create to submit the deployment. Once the deployment completes, the NAT gateway is ready to route traffic from your function app subnet to the Internet.

